At Glowskinhub.com, we believe beauty isn’t just a look—it’s a feeling
How to Achieve a Natural Makeup Look Without the Cakey Effect
Why Skincare Is the Foundation of Natural-Looking Makeup
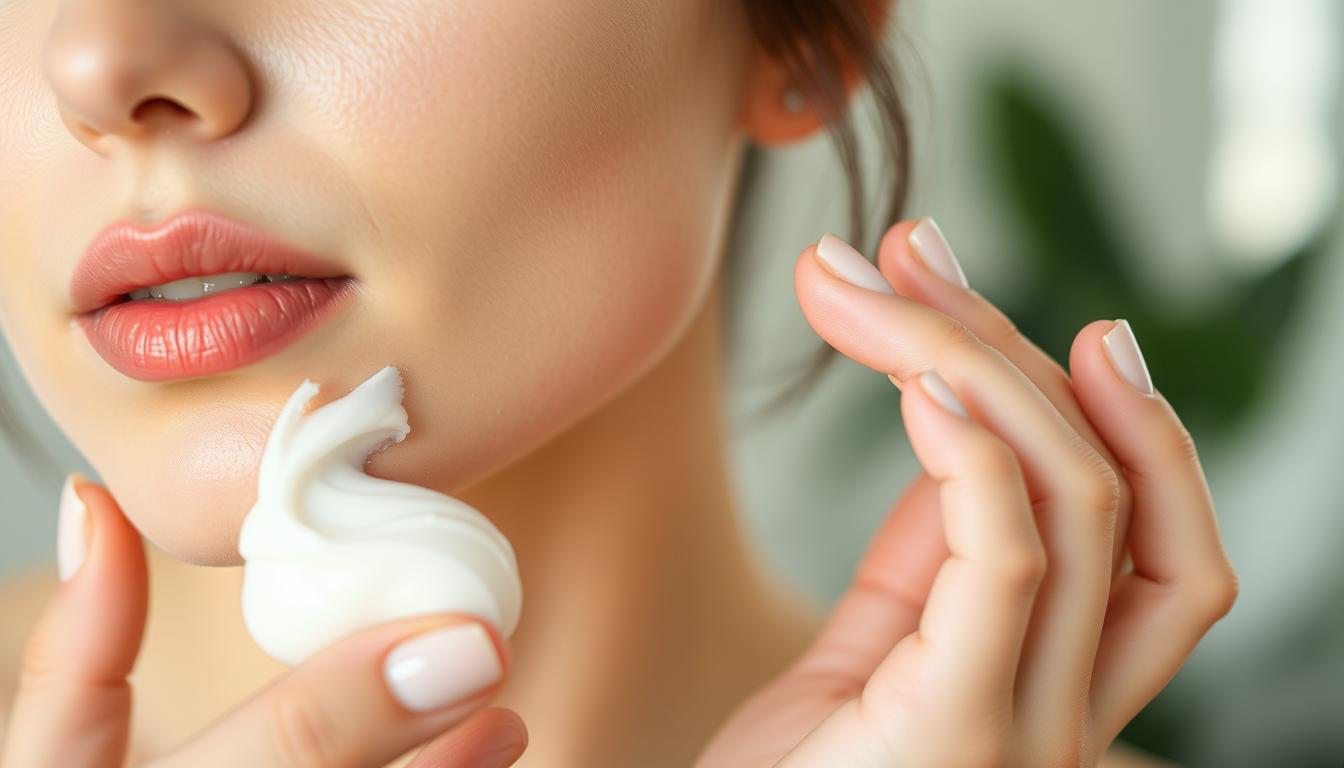
The most flawless makeup application begins long before you reach for your foundation. Proper skincare creates the perfect canvas for a natural, non-cakey finish. When your Skin is well-hydrated and smooth, makeup glides on evenly instead of clinging to dry patches or settling into fine lines.
Essential Skincare Steps Before Makeup Application
1. Cleanse Thoroughly
Start with a gentle cleanser that removes impurities without stripping your Skin’s natural oils. This creates a clean canvas for both skincare and makeup products to perform at their best.
2. Exfoliate Regularly (But Not Daily)
Removing dead Skin cells 2-3 times weekly prevents makeup from clinging to rough patches. Choose chemical exfoliants with AHAs or BHAs for a gentle approach that won’t create micro-tears in your Skin.
3. Hydrate Strategically
Apply a lightweight moisturizer appropriate for your Skin type. Allow it to fully absorb (about 5-10 minutes) before moving on to makeup. This creates a smooth, plump surface that helps makeup blend seamlessly.
4. Prime with Purpose
A good primer creates a barrier between your skincare and makeup, preventing foundation from being absorbed too quickly and extending wear time without heaviness.
Selecting Products That Enhance Without Masking

The products you choose play a crucial role in achieving a natural, non-cakey finish. The goal is to select formulations that enhance your features while allowing your natural Skin texture to shine through.
Foundation Alternatives for a Lightweight Base
Tinted Moisturizer
Offers sheer coverage with added hydration benefits. Perfect for those with generally clear Skin who just need slight tone evening.
Skin Tint
Even lighter than tinted moisturizer, Skin tints provide a wash of color that evens tone while being virtually undetectable on the Skin.
BB/CC Cream
Offers slightly more coverage than tinted moisturizer with added skincare benefits like SPF protection and color correction.
Texture Matters: Cream vs. Powder Products

For a truly natural finish, cream and liquid products are your best allies. Unlike powders that sit on top of the Skin, cream formulations melt into your complexion, creating a seamless finish that mimics your Skin’s natural texture.
- Cream blushes blend into the Skin for a natural flush that looks like it’s coming from within
- Liquid or cream highlighters create a dewy glow without visible shimmer particles
- Cream bronzers warm up the complexion without the powdery finish that can emphasize texture
- Cream eyeshadows create dimension without settling into creases
Reserve powder products for strategic setting in areas that tend to get oily, like the T-zone. This “powder minimalism” approach prevents the flat, matte look that can make makeup appear cakey and unnatural.
Application Techniques for a Flawless Finish
Even the best products can look cakey if applied incorrectly. These techniques will help you achieve a seamless, natural finish that lasts all day.

Warm Products with Your Fingers
Your body heat helps liquid and cream products melt into your Skin. Try warming foundation between your fingertips before applying, or use your ring finger (which applies the least pressure) to tap concealer into place.

Stipple, Don’t Wipe
Whether using fingers, a brush, or a sponge, press products into the Skin with a stippling (bouncing) motion rather than wiping or dragging. This builds coverage without disturbing the layers underneath.

Build in Thin Layers
Multiple thin layers always look more natural than one thick layer. Start with minimal product and gradually build coverage only where needed, allowing each layer to set slightly before adding more.
The Skin Tint Blending Technique
This technique creates an ultra-natural finish by focusing on strategic placement and thorough blending:
- Apply a pea-sized amount of Skin tint or lightweight foundation to the center of your face
- Using a damp Beauty sponge, blend outward toward the perimeter of your face
- Focus coverage on areas with discoloration or redness (typically around the nose and center of the face)
- Leave areas that are naturally even-toned (like the outer perimeters) with minimal to no product
- Blend past your jawline to eliminate any visible demarcation lines
Ready to perfect your blending technique?
Try this method with your favorite lightweight foundation or Skin tint and see the difference in your makeup’s finish.

Strategic Concealing Without Heaviness

Concealer is often overused, leading to a cakey appearance, especially under the eyes. The key is strategic placement and proper blending.
Pro Tip: Apply concealer only where needed—under eyes and around nostrils—to avoid heaviness. Less is more when it comes to concealer application.
The Triangle of Light Technique
Instead of applying concealer in a half-moon shape directly under your eyes (which can look unnatural), try the “triangle of light” technique:
- Apply small dots of concealer in an inverted triangle shape: from the inner corner of your eye, down toward the top of your cheekbone, and back up to the outer corner of your eye
- Use your ring finger or a damp Beauty sponge to tap (not wipe) the product into your Skin
- Focus on blending the edges so there’s no visible line of demarcation
- Set only if necessary, using a small amount of translucent powder on a fluffy brush
 This technique brightens the face while maintaining a natural appearance. The key is using a concealer that’s only 1-2 shades lighter than your foundation, not dramatically lighter, which can create an unnatural “reverse raccoon” effect.
Spot Concealing Blemishes
For blemishes and discoloration, precision is key:
- Use a small, pointed concealer brush to apply product directly on the blemish
- Tap gently to blend the edges while keeping coverage on the blemish itself
- Allow the concealer to set for 30 seconds before blending further
- Set with a tiny amount of translucent powder using a small brush
Powder Minimalism: The Key to Avoiding Cakey Makeup

Over-powdering is one of the main culprits behind cakey makeup. While powder has its place in setting makeup and controlling shine, using it strategically is essential for maintaining a natural finish.
The T-Zone Only Approach
Instead of applying powder all over your face, focus only on areas that tend to get oily—typically the T-zone (forehead, nose, and chin). This preserves the natural dimension and glow on the rest of your face.
How to Apply Powder Correctly:
- Use a fluffy brush rather than a powder puff or sponge for a lighter application
- Tap excess powder off the brush before applying to your face
- Press and roll the brush against your Skin rather than wiping or dragging
- Focus on the center of your face, using less product as you move outward
- Leave the high points of your face (tops of cheekbones, brow bone) powder-free for natural dimension

The Blotting Alternative
For a truly minimal approach, try using blotting papers instead of powder to control midday shine. This removes excess oil without adding more product to your face, preserving your makeup’s natural finish.
Ready to try powder minimalism?
Next time you do your makeup, challenge yourself to use half the amount of powder you normally would, focusing only on your T-zone.
Enhancing Your Natural Glow

A key characteristic of natural-looking makeup is a healthy glow that mimics how light naturally reflects off well-hydrated Skin. This dimension is what makes makeup look like Skin rather than a flat mask.
Liquid Illuminators vs. Powder Highlighters
For the most natural-looking glow, liquid and cream illuminators are superior to powder highlighters. They blend seamlessly into the Skin rather than sitting on top of it, creating a “lit from within” effect rather than an obvious stripe of shimmer.
Application Techniques:
- Mix a drop of liquid illuminator with your foundation for all-over radiance
- Apply cream highlighter before powder products for a more natural, “under the Skin” glow
- Use your fingertips to tap product onto the high points of your face—the warmth helps it melt into your Skin
- Focus on the tops of cheekbones, bridge of nose, cupid’s bow, and inner corners of eyes

Creating Dimension with Strategic Placement
Natural faces have dimension—they’re not flat and matte all over. To recreate this:
Highlight
Apply to areas that naturally catch light: tops of cheekbones, bridge of nose, cupid’s bow, and inner corners of eyes.
Bronze
Add warmth where the sun naturally hits: perimeter of forehead, temples, tops of cheekbones, and bridge of nose.
Blush
Create a natural flush by applying cream blush to the apples of cheeks and blending upward toward temples.
Common Mistakes That Cause Cakey Makeup

Understanding what causes makeup to look cakey is half the battle in achieving a natural finish. Here are the most common pitfalls to avoid:
Product-Related Mistakes
- Using the wrong foundation shade – A mismatched foundation creates an obvious line of demarcation that draws attention to the fact you’re wearing makeup
- Layering incompatible products – Water-based foundations can pill when applied over silicone-based primers
- Applying too much product – Building coverage with multiple thin layers always looks more natural than one thick layer
- Using expired products – Old foundation can separate and apply unevenly, creating a patchy, cakey finish
Technique-Related Mistakes
- Skipping skincare prep – Makeup applied to dry, flaky Skin will always look cakey
- Not allowing products to set – Applying powder immediately after foundation can cause products to clump
- Using the wrong tools – Brushes with dense, stiff bristles can create streaks and uneven application
- Over-powdering – Excessive powder flattens the Skin’s natural dimension and emphasizes texture
How can I fix makeup that’s already looking cakey?
If your makeup is already applied and looking cakey, try these rescue techniques:
- Press a damp Beauty sponge gently over cakey areas to rehydrate the makeup and press it back into the Skin
- Spritz with a hydrating setting spray and gently pat your face with your fingertips
- Apply a tiny amount of facial oil to your fingertips and press gently over dry, cakey areas
- For extremely cakey makeup, you may need to remove and reapply that section
Setting Your Makeup for All-Day Wear

The final step in achieving a natural, long-lasting makeup look is proper setting. This doesn’t necessarily mean covering your entire face with powder—in fact, that approach often leads to the cakey effect we’re trying to avoid.
Setting Sprays: Your Best Friend for Natural Makeup
Setting sprays help your makeup last longer while maintaining a natural, Skin-like finish. They’re especially valuable for preserving the dewy quality that makes makeup look natural.
How to Apply Setting Spray Correctly:
- Hold the bottle 8-10 inches away from your face
- Spray in an “X” and “T” pattern to ensure even coverage
- Allow to dry completely before touching your face or applying mascara
- For extra longevity, apply a light layer before foundation as well as after completing your makeup
Choose the Right Setting Spray Formula
- Dewy finish sprays – Contain glycerin and other humectants to maintain moisture
- Natural finish sprays – Balance longevity with a Skin-like appearance
- Mattifying sprays – Help control oil without the heaviness of powder
Looking for Makeup Products? Check out our top picks now!
The Pressing Technique for Powder
If you do need to use powder to set certain areas, the application technique makes all the difference:

- Use a translucent setting powder rather than a colored powder
- Load a small amount of powder onto a velour puff
- Fold the puff in half and rub it against itself to distribute the powder evenly
- Press and roll the puff onto your Skin rather than wiping or sweeping
- Focus only on areas that tend to get oily or where makeup tends to crease
- Use a clean fluffy brush to dust away any excess
This pressing technique sets makeup without disturbing the layers underneath, preventing the cakey appearance that can happen when powder is swept across the face.
Your “No-Cakey Makeup” Success Checklist

Use this checklist to verify you’ve achieved a truly natural, non-cakey makeup look:
- Your Skin still looks like Skin, with natural texture visible
- There are no visible lines of demarcation, especially along the jawline
- Your makeup has dimension, with natural highlights and shadows
- When you smile or move your face, your makeup moves with you without creasing
- Your complexion has a natural variation in finish—not completely matte all over
- Close-up inspection (even in harsh lighting) doesn’t reveal heavy layers of product
- Your makeup enhances rather than masks your natural features
- The overall effect is polished but not obviously “made up”
Ready to Perfect Your Natural Makeup Technique?
Practice makes perfect! Try these techniques with your current products before investing in new ones. Often, the application method matters more than the product itself.
Embracing Your Natural Beauty
Creating a natural makeup look without the cakey effect isn’t about masking your features—it’s about enhancing what makes you uniquely beautiful. By focusing on proper skincare prep, choosing the right products, and mastering application techniques that work with your Skin rather than against it, you can achieve a flawless finish that looks like your Skin at its very best.
Remember that practice makes perfect, and don’t be afraid to experiment with different techniques to find what works best for your unique Skin type and features. The most beautiful makeup is the kind that makes you feel confident while still looking like yourself—just a little more polished.
“The best makeup is the makeup that enhances rather than conceals, that works with your Skin rather than fighting against it, and that makes you feel like the most confident version of yourself.”

")