At Glowskinhub.com, we believe beauty isn’t just a look—it’s a feeling
Beginner’s guide to contouring and highlighting
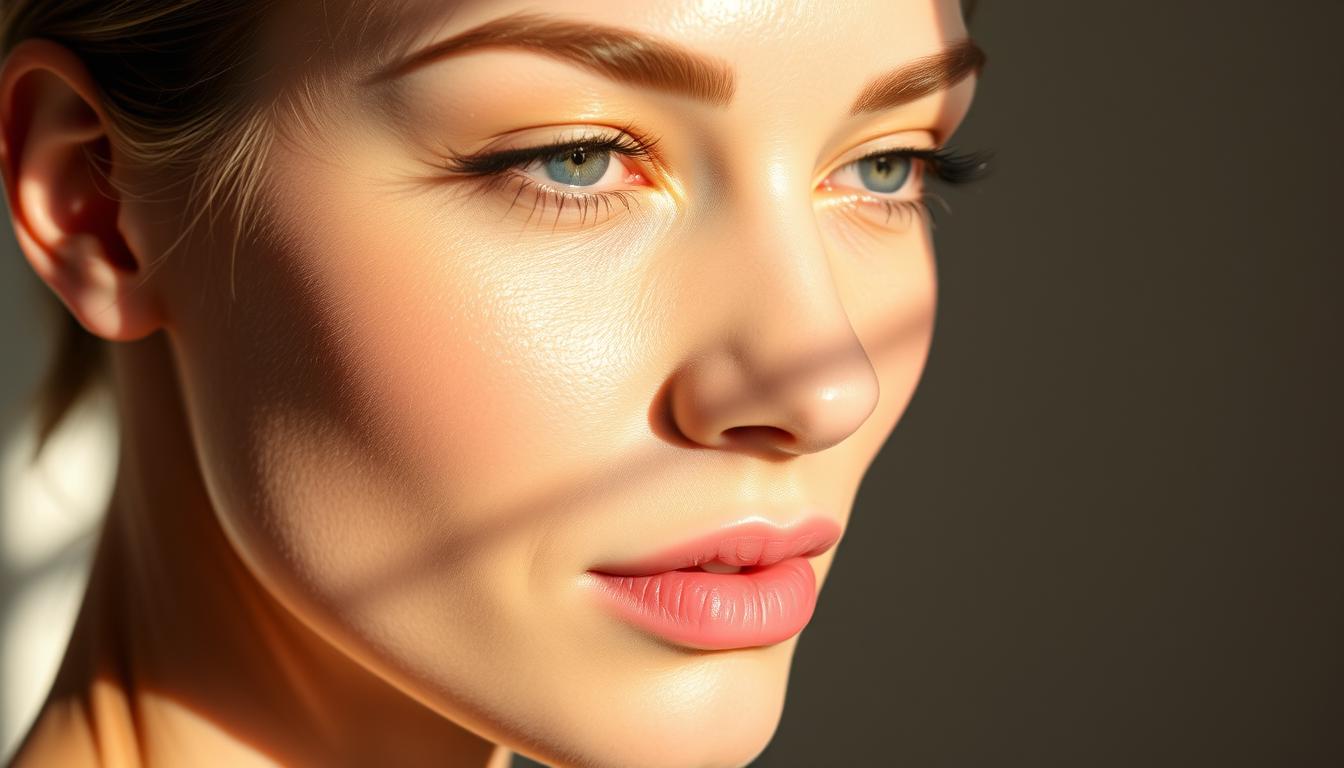
Contouring and highlighting are essential techniques in any makeup routine, helping to enhance one’s natural features and achieve a flawless finish.
For those with oily Skin, it’s crucial to combine these makeup techniques with appropriate skincare for oily Skin to ensure a smooth canvas.
By understanding how to effectively contour and highlight, individuals can accentuate their best features and boost their confidence.
This guide will walk you through the basics of contouring and highlighting, providing oily Skin care tips along the way to help you achieve a stunning, long-lasting look.
Key Takeaways
- Understand the basics of contouring and highlighting
- Learn how to choose the right products for your Skin type
- Discover tips for applying contour and highlight effectively
- Find out how to combine makeup techniques with skincare for oily Skin
- Achieve a flawless, long-lasting finish with our expert advice
The Fundamentals of Contouring and Highlighting
Understanding the basics of contouring and highlighting is crucial for achieving a flawless makeup look. These two techniques are fundamental in enhancing one’s facial features and creating a more defined appearance.
What is Contouring?
Contouring is a makeup technique used to create the illusion of depth and definition on the face. By applying a product that is one shade deeper than your natural Skin tone to specific areas, you can create shadows that slim and sculpt the face. Key areas to contour include the cheekbones, jawline, and forehead. Contouring can make a significant difference in how defined your features appear, and it’s a great way to enhance your natural bone structure.
What is Highlighting?
Highlighting involves applying a product that is lighter than your Skin tone to the high points of your face to accentuate and bring forward these areas. Typical highlighting areas include the tops of the cheekbones, nose, cupid’s bow, and brow bone. Highlighting not only adds a radiant glow to your complexion but also helps to create a more lifted and youthful appearance. For best results, choose a highlighter that complements your Skin tone.

Essential Tools and Products for Beginners
The world of contouring and highlighting is vast, but beginners can easily get started with a few essential products and tools. To achieve a natural-looking finish, it’s crucial to understand the basic tools and products required for these makeup techniques.
Brushes and Applicators
Investing in the right contouring brushes and highlighter applicators can make a significant difference in your makeup routine. For contouring, a fluffy brush or a angled brush works best as it allows for precise application along the cheekbones, jawline, and forehead. For highlighting, a smaller, more precise applicator or a Beauty blender can help in applying the highlighter to the desired areas such as the tops of the cheekbones, nose, and cupid’s bow.

Contour Products
When it comes to contour products, choosing the right shade is vital. For beginners, a matte contour powder or cream that is one to two shades deeper than your natural Skin tone is recommended. Popular contour products include those from Charlotte Tilbury and Anastasia Beverly Hills. For individuals with oily Skin, it’s advisable to opt for powder contour products as they tend to last longer and are less likely to smudge.
Highlighter Products
Highlighter products come in various forms, including powders, creams, and liquids. For a beginner, a highlighter stick or a liquid highlighter applied with a small applicator can be easy to use. When choosing a highlighter, consider your Skin tone; fair Skin looks best with soft, champagne highlighters, while deeper Skin tones can pull off brighter, more intense highlighters. Be sure to check out Becca and NARS for high-quality highlighters suitable for various Skin types, including oily Skin.
Cream vs. Powder Products: Which to Choose
When it comes to contouring and highlighting, one of the key decisions you’ll face is whether to use cream or powder products. Both have their unique advantages and are suited to different Skin types and preferences.
Benefits of Cream Products
Cream contour products are known for their ease of blending and natural finish. They are particularly beneficial for dry or mature Skin as they provide hydration and a subtle definition. Cream products can be easily buffed into the Skin, creating a seamless look.
Benefits of Powder Products
Powder contour products, on the other hand, are great for oily Skin as they help control shine and last longer. They are also excellent for setting cream products and adding an extra layer of definition. Powder products are often preferred for their ease of use and quick application.
Recommendations Based on Skin Type
For those with oily Skin, powder contour products are generally recommended as they help keep the Skin matte throughout the day. If you’re looking for an oily Skin moisturizer to pair with your contouring routine, choose a lightweight, oil-free formula. For dry or mature Skin, cream contour products are ideal as they provide moisture and a natural glow. Regardless of your Skin type, following a consistent oily Skin regimen or skincare routine can enhance your contouring results.

Preparing Your Face: Creating the Perfect Canvas
Before diving into contouring and highlighting, it’s essential to prepare your Skin for a flawless finish. A well-prepared Skin surface allows for smoother application and a more natural-looking result.
Skincare Preparation
Effective skincare for oily Skin is crucial before applying makeup. Start by cleansing your face with a gentle cleanser suitable for your Skin type. Follow up with a toner to balance your Skin’s pH and a lightweight moisturiser to hydrate your Skin without clogging pores. For oily Skin, consider oily Skin care tips such as using oil-free products and exfoliating once or twice a week to keep your Skin clear.
Base Makeup Application
Once your Skin is prepped, apply a base makeup that matches your Skin tone. This creates an even base for contouring and highlighting. Use a foundation or tinted moisturiser that suits your Skin type, applying it evenly with a brush, Beauty blender, or your fingers. Blend well to ensure a seamless finish, setting your base makeup with a light dusting of powder to create a smooth canvas for further makeup application.

Identifying Your Face Shape for Optimal Contouring
Understanding your face shape is crucial for effective contouring. Different face shapes require unique contouring techniques to enhance their natural features. By identifying your face shape, you can choose the most flattering contouring methods.
There are several common face shapes, each with its own contouring requirements. Let’s explore the main face shapes and their respective contouring tips.
Oval Face Shape
Oval faces are considered ideal for contouring as they are symmetrical. To enhance an oval face, focus on subtle contouring to define the cheekbones and jawline. Use a light hand when applying contour products.
Round Face Shape
For round faces, the goal is to create the illusion of length. Apply contour to the jawline and temples to elongate the face. Avoid heavy contouring on the cheeks.
Square Face Shape
Square faces benefit from softening the angular features. Contour the jawline and temples subtly to reduce the squareness. Highlighting the centre of the face can also help.
Heart Face Shape
Heart-shaped faces have a broad forehead and temples, with a narrower chin. Contouring the temples and highlighting the lower part of the face can balance the features.
Diamond Face Shape
Diamond faces are narrow at the forehead and jawline, with prominent cheekbones. To balance this shape, contour the cheekbones subtly and highlight the forehead and jawline.
| Face Shape | Contouring Focus | Highlighting Tips |
|---|---|---|
| Oval | Cheekbones, Jawline | Subtle highlighting on high points |
| Round | Jawline, Temples | Highlight the centre of the face |
| Square | Jawline, Temples | Highlight the centre of the face |
| Heart | Temples | Lower part of the face |
| Diamond | Cheekbones | Forehead, Jawline |

Beginner’s Guide to Contouring and Highlighting: Step-by-Step Tutorial
Mastering the art of contouring and highlighting can seem daunting, but with a step-by-step guide, you’ll be enhancing your features in no time. These techniques, when applied correctly, can dramatically improve the definition of your facial features, giving you a more sculpted and radiant appearance.
Mapping Your Face
Before you start contouring and highlighting, it’s essential to understand the structure of your face. Mapping your face involves identifying the areas you want to accentuate or define. Use a mirror and observe the natural shadows and highlights on your face to determine where to apply contour and highlight products.
Cheekbone Contouring
To contour your cheekbones, use a contour powder or cream that’s one shade deeper than your Skin tone. Apply it along the hollow of your cheek, starting from the ear and working your way towards the corner of your mouth. Blend well to create a natural-looking definition.

Jawline and Forehead Contouring
For a more defined jawline, apply contour along the edge of your jaw, blending downwards towards your neck. On the forehead, contouring can help reduce the appearance of a prominent forehead. Apply the product along the hairline, blending upwards.
Nose Contouring
Nose contouring can make your nose appear slimmer. Use a light hand when applying contour to the sides of your nose. Blend carefully to avoid any harsh lines.
Strategic Highlighting Placement
Highlighting is about applying a lighter shade to the high points of your face. Apply highlighter to the tops of your cheekbones, nose, cupid’s bow, and brow bone. This will give your face a radiant and lifted appearance. For oily Skin, consider using a powder highlighter to avoid accentuating pores.
By following these steps and practicing regularly, you’ll become more comfortable with contouring and highlighting, and you’ll be able to achieve a flawless, defined look that enhances your natural features.
Mastering the Art of Blending
To create a truly natural-looking contour, mastering the art of blending is vital. Blending is what transforms a good contour into a great one by ensuring that the edges are soft and seamless.
Tools for Seamless Blending
The right tools can make all the difference in achieving a smooth blend. Contouring brushes are designed to work with both cream and powder products, allowing for precise application and blending. For oily Skin, using products labelled as “oil-control” or “matte” can help extend the wear of your contour and reduce shine.

Circular Motion Technique
One of the most effective blending techniques is the circular motion. Using a fluffy brush or a damp Beauty blender, gently buff the contoured areas in a circular motion to soften any harsh lines. This technique is particularly useful for blending out the edges of contour products on the cheekbones and jawline.
Patting and Buffing Methods
In addition to the circular motion, patting and buffing can also be used to blend contour and highlight products. Patting is gentle and helps to meld the product into the Skin, while buffing is more vigorous and can be used to create a more seamless finish. For oily Skin, a light patting motion with a powder brush can help to set the contour without adding extra shine.
Common Contouring Mistakes and How to Avoid Them
Achieving a flawless contour can be tricky, but knowing the common mistakes can help you avoid them. Contouring and highlighting are art forms that enhance your natural features, but certain errors can detract from your overall look.
Using the Wrong Shade
One of the most common contouring mistakes is using a shade that is too dark or too light for your Skin tone. To avoid this, always test the contour product on your jawline before applying it to other areas. For oily Skin, choose a matte finish to prevent shine.
Over-Application
Over-application can lead to an unnatural look. Start with a light hand and gradually build up the product. This is especially true for beginners who might not be familiar with how much product is too much.
Poor Blending
Poor blending can result in harsh lines that are noticeable. Use a brush or Beauty blender to seamlessly blend the contour into your Skin. Practice makes perfect, so don’t be discouraged if it takes a few tries to get it right.
Incorrect Placement
Incorrect placement of contour and highlight can distort your features. Study your face shape and understand where to apply contour and highlight for the most flattering effect.
| Common Mistake | Corrective Measure |
|---|---|
| Using the Wrong Shade | Test on jawline, choose appropriate tone |
| Over-Application | Start with light application, build up gradually |
| Poor Blending | Use brush or Beauty blender for seamless blend |
| Incorrect Placement | Study face shape, apply accordingly |
By being aware of these common contouring mistakes and taking steps to avoid them, you can achieve a beautifully contoured face that enhances your natural Beauty.
Contouring and Highlighting for Different Skin Tones
Different Skin tones require tailored approaches to contouring and highlighting for optimal results. Understanding the nuances of your Skin tone can help you choose the right products and techniques.
Fair Skin
For fair Skin, it’s essential to choose contour and highlight products that are not too dark or overpowering. Opt for soft, subtle shades that enhance your natural features without looking unnatural. Cool-toned products can help to create a natural-looking definition.
Medium Skin
Medium Skin tones can pull off a variety of contour and highlight shades. Golden or peach-toned highlighters can add warmth, while contour products with a slightly deeper shade than your Skin tone can create definition. Blending is key to avoid harsh lines.
Olive Skin
Olive Skin benefits from contour and highlight products with golden or yellow undertones. These help to create a sun-kissed look that complements the Skin’s natural tone. Be cautious with cool-toned products, as they might make the Skin appear muddy.
Dark Skin
For dark Skin, rich, deep contour shades can create stunning definition. Highlighters with bronze or caramel tones can beautifully enhance the Skin’s natural glow. Ensure that the products are well-blended to avoid any noticeable transitions.
Regardless of your Skin tone, the key to successful contouring and highlighting lies in subtle application and blending. Practice makes perfect, so don’t be discouraged if it takes a few attempts to get it right.
Best Products for Beginners in the UK Market
The UK market offers a wide range of contouring and highlighting products suitable for beginners. With numerous options available, it’s essential to choose products that are not only effective but also easy to apply.
Budget-Friendly Options
For those on a tight budget, there are several affordable contouring and highlighting products available in the UK. Rimmel London offers a variety of products that are both affordable and of good quality. Their Kind & Free range is particularly popular among beginners. Another budget-friendly option is the Maybelline Fit Me! contour kit, which provides a subtle definition at an affordable price.
Mid-Range Products
Mid-range products often offer a balance between quality and affordability. The NARS range, including their popular Laguna contour powder, is widely used and praised for its performance. Tarte also offers high-quality contouring products that are easy to blend and provide a natural finish. Their Shape Tape contour concealer is a favorite among makeup enthusiasts.
High-End Investments
For those willing to invest in their makeup routine, high-end contouring and highlighting products can provide superior results. Tom Ford is renowned for its luxurious makeup products, including contouring and highlighting options that offer precise application and long-lasting wear. Another high-end brand, Charlotte Tilbury, offers a range of products that are both effective and beautifully presented, such as her Filmstar Bronze & Glow palette.
Beyond the Face: Contouring Collarbones and Body
The art of contouring extends beyond the face to the body, offering a comprehensive approach to enhancing one’s natural features. By applying contouring techniques to other areas, individuals can achieve a more polished look.
“Contouring is not just about the face; it’s about enhancing your entire physique,” says a renowned makeup artist. This broader application can be particularly beneficial for special occasions.
Collarbone and Décolletage Highlighting
Highlighting the collarbone and décolletage area can create a stunning, radiant appearance. Use a highlighter that is one to two shades lighter than your Skin tone to accentuate these areas. Apply the highlighter along the collarbone and down to the décolletage to create a subtle glow.
Arm and Leg Contouring for Special Occasions
For special occasions, contouring can be applied to the arms and legs to enhance their appearance. Use a bronzing cream or powder to create a natural-looking definition. For instance, applying a slightly darker shade along the underside of the arms can create a slimmer appearance.
By incorporating these body contouring techniques, individuals can achieve a more confident and enhanced version of themselves.
Conclusion
Contouring and highlighting can elevate your makeup routine, enhancing your natural features and boosting confidence. By following this contouring and highlighting guide, you have learned the fundamentals of these techniques, including the essential tools and products, face shape identification, and step-by-step tutorials.
To achieve a flawless finish, it is crucial to maintain a good skincare routine, especially for those with oily Skin. A best skincare routine for oily Skin involves using products that control sebum production and keep the Skin hydrated. Incorporating skincare for oily Skin into your daily regimen will help your makeup stay in place longer and look more natural.
Practice makes perfect, and with consistent practice, you can master the art of contouring and highlighting. Experiment with different products and techniques to find what works best for you. By combining these makeup techniques with a proper skincare routine, you can achieve a stunning, professional finish that enhances your natural Beauty.
FAQ
What is the best skincare routine for oily Skin before contouring and highlighting?
For oily Skin, start with a gentle cleanser, followed by a toner that controls oil production. Use a lightweight, oil-free moisturiser to hydrate the Skin without clogging pores. Finish with a primer that helps makeup stay in place longer. Products containing salicylic acid or glycolic acid can be beneficial for oily Skin.
How do I choose the right contour products for my Skin tone?
For fair Skin, opt for soft, peachy tones. Medium Skin tones can use terracotta or soft brown shades. Olive Skin benefits from golden or bronze shades, while dark Skin looks great with deep, cool browns or taupes. Always test the product on your jawline to ensure it blends well with your natural Skin tone.
Can I use the same highlighter for different Skin tones?
While some highlighters are versatile, it’s best to choose a shade that complements your Skin tone. Fair Skin looks radiant with soft pink or peach highlighters. Medium to olive Skin tones can use golden or champagne shades, and dark Skin is enhanced by deep bronze or copper highlighters.
What are the best products for oily Skin that won’t exacerbate oiliness?
Look for oil-free or non-comedogenic products that are labelled as suitable for oily Skin. Mattifying primers, mineral powders, and gel or Serum-based highlighters are good options. Brands like MAC, NARS, and Rimmel offer a range of products suitable for oily Skin.
How often should I contour and highlight?
Contouring and highlighting are typically used for special occasions or evening events. For daily wear, a subtle, natural application is recommended. Overdoing it can look unnatural and may accentuate pores or oily Skin.
Is it necessary to moisturise oily Skin before applying makeup?
Yes, moisturising is essential, even for oily Skin. Use a lightweight, oil-free moisturiser to keep your Skin hydrated and create a smooth canvas for makeup. Skipping moisturiser can lead to over-production of sebum, making the Skin appear oilier.
Can contouring and highlighting help define facial features for different face shapes?
Absolutely. By applying contour and highlight strategically, you can enhance your natural features and create the illusion of a more defined face shape. For example, contouring the jawline can make a round face appear more angular.
What are some common mistakes to avoid when contouring and highlighting?
Common mistakes include using the wrong shade, over-application, poor blending, and incorrect placement. To avoid these, choose products that match your Skin tone, build up your application gradually, blend thoroughly, and study your face shape to apply products correctly.


")